

Drop Tables
Every number here is calculated straight from the game's settings. Pick a map to see which containers, guardians and boss are on each floor, and which treasures they can give.
What each map gives
These odds already include the map's loot luck. Treasure Tides, the Lucky Compass, pets and potions raise the Rare+ odds further (see How it works).
 Tidal Atoll Loot luck ×1
 Containers: how many per floor, items each, quality odds
| Floor | Container | How many | Items | Common | Uncommon | Rare | Epic | Legendary | Mythic |
|---|---|---|---|---|---|---|---|---|---|
| Atoll RimRim (by the docks) |  Sand Pile | 8 | 1~2 | 85% | 15% | – | – | – | – |
| Coral TerraceFloor 1 | Sand Pile | 10 | 1~2 | 70% | 25% | 5% | – | – | – |
| Coral TerraceFloor 1 |  Urn | 6 | 1~2 | 55% | 35% | 9% | 1% | – | – |
| Coral TerraceFloor 1 | 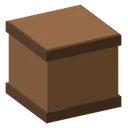 Crate | 6 | 2~3 | 60% | 32% | 7.5% | 0.5% | – | – |
| Coral TerraceFloor 1 | 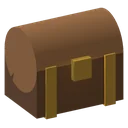 Treasure Chest | 3 | 2~3 | 30% | 45% | 21% | 3.8% | 0.2% | – |
| Shipwreck ShallowsFloor 2 | Sand Pile | 6 | 1~2 | 45% | 38% | 15% | 2% | – | – |
| Shipwreck ShallowsFloor 2 | Urn | 6 | 1~2 | 35% | 40% | 20% | 4.7% | 0.3% | – |
| Shipwreck ShallowsFloor 2 | Crate | 6 | 2~3 | 35% | 40% | 20% | 4.5% | 0.5% | – |
| Shipwreck ShallowsFloor 2 | Treasure Chest | 5 | 2~4 | 10% | 35% | 38% | 14% | 2.8% | 0.2% |
| Tide TempleFloor 3 | Sand Pile | 3 | 1~2 | 25% | 35% | 28% | 10% | 2% | – |
| Tide TempleFloor 3 | Urn | 4 | 1~2 | 15% | 35% | 32% | 14% | 3.7% | 0.3% |
| Tide TempleFloor 3 | Crate | 4 | 2~3 | 15% | 33% | 33% | 15% | 3.6% | 0.4% |
| Tide TempleFloor 3 | Treasure Chest | 5 | 3~4 | – | 30% | 45% | 20% | 4.5% | 0.5% |
| Tide TempleFloor 3 | 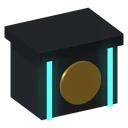 Ancient Vault | 1 | 4~5 | – | 10% | 40% | 35% | 13% | 2% |
 Guardians & boss: drop chance, quality, and scrolls / eggs / crystals
| Floor | Guardian | How many | Drop chance | Common | Uncommon | Rare | Epic | Legendary | Mythic | Tide Rune Scroll | Tide Egg | Hue Crystal |
|---|---|---|---|---|---|---|---|---|---|---|---|---|
| Coral Terrace |  Reef CrabHP 40 · Damage 8 · Bounty  6 | 9 | 35% | 70% | 30% | – | – | – | – | 0% | 0% | 2% |
| Shipwreck Shallows |  Rusted SentinelHP 110 · Damage 16 · Bounty 25 | 8 | 50% | – | 60% | 38% | 2% | – | – | 6% | 0.5% | 8% |
| Shipwreck Shallows | Reef CrabHP 40 · Damage 8 · Bounty 6 | 3 | 35% | 70% | 30% | – | – | – | – | 0% | 0% | 2% |
| Tide Temple |  Deep WardenHP 260 · Damage 28 · Bounty 80 | 7 | 70% | – | 20% | 55% | 23% | 2% | – | 14% | 2% | 16% |
| Tide Temple |  Tide ColossusHP 4,200 · Damage 45 · Bounty 800HP when fighting alone; each extra player adds +60% HP (up to ×2.8). | 1 | Always 3 items | – | – | 30% | 50% | 18% | 2% | 100% | 25% | 100% |
 Items you can find here ( = exclusive to this map)
 Sand Dollar
 Old Rope
 Driftwood
 Cork Float
 Pottery Shard
 Shell Shard
 Fish Bone
 Rusty BoltOnce this quality is rolled, each one is equally likely (1/8 each)
 Coconut
 Glow Jellyfish
 Ship Lantern
 Fishing Rod
 Brass Compass
 Deep Sea Potion
 String of Copper Coins
 Sea GlassOnce this quality is rolled, each one is equally likely (1/8 each)
 Lagoon Glass Orb
 Silver Ingot
 Tide Pendant
 Navigator's Chart
 Captain's Spectacles
 Pearl
 Jade Fish Charm
 Silver Goblet
 Tide Rune Scroll
 Hue CrystalOnce this quality is rolled, each one is equally likely (1/10 each)
 Gilded Anchor
 Ancient Helm
 Ancient Gears
 Gold Ingot
 Black Pearl
 Ruby Ring
 Tide EggOnce this quality is rolled, each one is equally likely (1/7 each)
 Sapphire TridentDeep Blue Diamond
 Tide Crown
 Royal Decree
 Moonlight PearlOnce this quality is rolled, each one is equally likely (1/5 each)
 Scepter of the First Tide King
 Leviathan Scale
 Eternal Hourglass
 Sunken StarOnce this quality is rolled, each one is equally likely (1/4 each)
 Firefly Mangroves Loot luck ×1.2
Containers: how many per floor, items each, quality odds
| Floor | Container | How many | Items | Common | Uncommon | Rare | Epic | Legendary | Mythic |
|---|---|---|---|---|---|---|---|---|---|
| Mudflat RimRim (by the docks) | Sand Pile | 8 | 1~2 | 85% | 15% | – | – | – | – |
| Root HallsFloor 1 | Sand Pile | 10 | 1~2 | 69.3% | 24.8% | 5.9% | – | – | – |
| Root HallsFloor 1 | Urn | 6 | 1~2 | 53.8% | 34.2% | 10.6% | 1.4% | – | – |
| Root HallsFloor 1 | Crate | 6 | 2~3 | 59% | 31.5% | 8.8% | 0.7% | – | – |
| Root HallsFloor 1 | Treasure Chest | 3 | 2~3 | 28.3% | 42.5% | 23.8% | 5% | 0.3% | – |
| Firefly BogFloor 2 | Sand Pile | 6 | 1~2 | 43.4% | 36.6% | 17.3% | 2.7% | – | – |
| Firefly BogFloor 2 | Urn | 6 | 1~2 | 33% | 37.7% | 22.6% | 6.2% | 0.5% | – |
| Firefly BogFloor 2 | Crate | 6 | 2~3 | 33% | 37.7% | 22.6% | 5.9% | 0.8% | – |
| Firefly BogFloor 2 | Treasure Chest | 5 | 2~4 | 8.7% | 30.4% | 39.6% | 17% | 4% | 0.3% |
| Heartwood HollowFloor 3 | Sand Pile | 3 | 1~2 | 22.5% | 31.6% | 30.3% | 12.6% | 3% | – |
| Heartwood HollowFloor 3 | Urn | 4 | 1~2 | 13.1% | 30.5% | 33.5% | 17.1% | 5.3% | 0.5% |
| Heartwood HollowFloor 3 | Crate | 4 | 2~3 | 13% | 28.6% | 34.4% | 18.2% | 5.1% | 0.7% |
| Heartwood HollowFloor 3 | Treasure Chest | 5 | 3~4 | – | 24.9% | 44.9% | 23.3% | 6.1% | 0.8% |
| Heartwood HollowFloor 3 | Ancient Vault | 1 | 4~5 | – | 7.6% | 36.3% | 37.1% | 16.1% | 2.9% |
Guardians & boss: drop chance, quality, and scrolls / eggs / crystals
| Floor | Guardian | How many | Drop chance | Common | Uncommon | Rare | Epic | Legendary | Mythic | Tide Rune Scroll | Tide Egg | Hue Crystal |
|---|---|---|---|---|---|---|---|---|---|---|---|---|
| Root Halls | Bog Reef CrabHP 54 · Damage 9 · Bounty 8 | 6 | 35% | 70% | 30% | – | – | – | – | 0% | 0% | 2% |
| Root Halls |  Bog SkitterHP 19 · Damage 6 · Bounty 4 | 2 packs (4 each) | 15% | 80% | 20% | – | – | – | – | 0% | 0% | 1% |
| Firefly Bog | Bog Rusted SentinelHP 149 · Damage 18 · Bounty 35 | 4 | 50% | – | 55.6% | 42.2% | 2.2% | – | – | 6% | 0.5% | 8% |
| Firefly Bog |  Bog Bog SpitterHP 74 · Damage 14 · Bounty 22 | 4 | 45% | 28.8% | 48.1% | 20.8% | 2.3% | – | – | 4% | 0.4% | 6% |
| Firefly Bog | Bog Reef CrabHP 54 · Damage 9 · Bounty 8 | 2 | 35% | 70% | 30% | – | – | – | – | 0% | 0% | 2% |
| Heartwood Hollow | Bog Deep WardenHP 351 · Damage 32 · Bounty 112 | 4 | 70% | – | 17.2% | 56.9% | 23.8% | 2.1% | – | 14% | 2% | 16% |
| Heartwood Hollow |  Bog ShellbackHP 230 · Damage 21 · Bounty 53 | 2 | 60% | – | 35.7% | 49.3% | 13.9% | 1.1% | – | 9% | 1% | 10% |
| Heartwood Hollow |  Old RootbackHP 4,193 · Damage 47 · Bounty 1,120HP when fighting alone; each extra player adds +60% HP (up to ×2.8). | 1 | Always 3 items | – | – | 30% | 50% | 18% | 2% | 100% | 25% | 100% |
Items you can find here ( = exclusive to this map)
 Mangrove RootOld RopeDriftwoodCork FloatPottery ShardShell ShardFish BoneRusty BoltOnce this quality is rolled, each one is equally likely (1/8 each)
 Mud Crab ClawGlow JellyfishShip LanternFishing RodBrass CompassDeep Sea PotionString of Copper CoinsSea GlassOnce this quality is rolled, each one is equally likely (1/8 each)
 Firefly LanternSilver IngotTide PendantNavigator's ChartCaptain's SpectaclesPearlJade Fish CharmSilver GobletTide Rune ScrollHue CrystalOnce this quality is rolled, each one is equally likely (1/10 each)Gilded AnchorAncient HelmAncient GearsGold IngotBlack PearlRuby RingTide EggOnce this quality is rolled, each one is equally likely (1/7 each)Sapphire TridentDeep Blue DiamondTide CrownRoyal DecreeMoonlight PearlOnce this quality is rolled, each one is equally likely (1/5 each)Scepter of the First Tide KingLeviathan ScaleEternal HourglassSunken StarOnce this quality is rolled, each one is equally likely (1/4 each)
 Pastel Coral Garden Loot luck ×1.35
Containers: how many per floor, items each, quality odds
| Floor | Container | How many | Items | Common | Uncommon | Rare | Epic | Legendary | Mythic |
|---|---|---|---|---|---|---|---|---|---|
| Pearl BeachRim (by the docks) | Sand Pile | 8 | 1~2 | 85% | 15% | – | – | – | – |
| Pink ReefFloor 1 | Sand Pile | 10 | 1~2 | 68.8% | 24.6% | 6.6% | – | – | – |
| Pink ReefFloor 1 | Urn | 6 | 1~2 | 52.9% | 33.7% | 11.7% | 1.7% | – | – |
| Pink ReefFloor 1 | Crate | 6 | 2~3 | 58.3% | 31.1% | 9.8% | 0.8% | – | – |
| Pink ReefFloor 1 | Treasure Chest | 3 | 2~3 | 27.2% | 40.8% | 25.7% | 6% | 0.4% | – |
| Anemone ValeFloor 2 | Sand Pile | 6 | 1~2 | 42.2% | 35.6% | 19% | 3.3% | – | – |
| Anemone ValeFloor 2 | Urn | 6 | 1~2 | 31.6% | 36.1% | 24.4% | 7.4% | 0.6% | – |
| Anemone ValeFloor 2 | Crate | 6 | 2~3 | 31.5% | 36% | 24.3% | 7.1% | 1% | – |
| Anemone ValeFloor 2 | Treasure Chest | 5 | 2~4 | 7.8% | 27.4% | 40.2% | 19.1% | 4.9% | 0.5% |
| Clam SanctumFloor 3 | Sand Pile | 3 | 1~2 | 20.9% | 29.2% | 31.6% | 14.6% | 3.8% | – |
| Clam SanctumFloor 3 | Urn | 4 | 1~2 | 11.8% | 27.6% | 34.1% | 19.2% | 6.6% | 0.7% |
| Clam SanctumFloor 3 | Crate | 4 | 2~3 | 11.7% | 25.8% | 34.8% | 20.4% | 6.3% | 0.9% |
| Clam SanctumFloor 3 | Treasure Chest | 5 | 3~4 | – | 21.9% | 44.3% | 25.4% | 7.4% | 1.1% |
| Clam SanctumFloor 3 | Ancient Vault | 1 | 4~5 | – | 6.2% | 33.7% | 38.1% | 18.3% | 3.6% |
Guardians & boss: drop chance, quality, and scrolls / eggs / crystals
| Floor | Guardian | How many | Drop chance | Common | Uncommon | Rare | Epic | Legendary | Mythic | Tide Rune Scroll | Tide Egg | Hue Crystal |
|---|---|---|---|---|---|---|---|---|---|---|---|---|
| Pink Reef | Coral Reef CrabHP 68 · Damage 10 · Bounty 11 | 5 | 35% | 70% | 30% | – | – | – | – | 0% | 0% | 2% |
| Pink Reef | Coral SkitterHP 24 · Damage 7 · Bounty 5 | 2 packs (4 each) | 15% | 80% | 20% | – | – | – | – | 0% | 0% | 1% |
| Anemone Vale | Coral Rusted SentinelHP 187 · Damage 21 · Bounty 45 | 4 | 50% | – | 52.6% | 45% | 2.4% | – | – | 6% | 0.5% | 8% |
| Anemone Vale | Coral Bog SpitterHP 94 · Damage 16 · Bounty 29 | 3 | 45% | 28% | 46.7% | 22.7% | 2.5% | – | – | 4% | 0.4% | 6% |
| Anemone Vale |  Coral Tide MenderHP 128 · Damage 10 · Bounty 54 | 2 | 60% | – | 37.7% | 49.8% | 11.3% | 1.1% | – | 10% | 1.2% | 12% |
| Clam Sanctum | Coral Deep WardenHP 442 · Damage 36 · Bounty 144 | 4 | 70% | – | 15.6% | 58% | 24.3% | 2.1% | – | 14% | 2% | 16% |
| Clam Sanctum | Coral ShellbackHP 289 · Damage 23 · Bounty 68 | 2 | 60% | – | 33.1% | 51.3% | 14.5% | 1.1% | – | 9% | 1% | 10% |
| Clam Sanctum | Coral Tide MenderHP 128 · Damage 10 · Bounty 54 | 1 | 60% | – | 37.7% | 49.8% | 11.3% | 1.1% | – | 10% | 1.2% | 12% |
| Clam Sanctum |  Coral QueenHP 4,463 · Damage 59 · Bounty 1,440HP when fighting alone; each extra player adds +60% HP (up to ×2.8). | 1 | Always 3 items | – | – | 30% | 50% | 18% | 2% | 100% | 25% | 100% |
Items you can find here ( = exclusive to this map)
 Pink Coral SprigOld RopeDriftwoodCork FloatPottery ShardShell ShardFish BoneRusty BoltOnce this quality is rolled, each one is equally likely (1/8 each)
 Sea GrapesGlow JellyfishShip LanternFishing RodBrass CompassDeep Sea PotionString of Copper CoinsSea GlassOnce this quality is rolled, each one is equally likely (1/8 each)
 Rainbow ScaleSilver IngotTide PendantNavigator's ChartCaptain's SpectaclesPearlJade Fish CharmSilver GobletTide Rune ScrollHue CrystalOnce this quality is rolled, each one is equally likely (1/10 each)Gilded AnchorAncient HelmAncient GearsGold IngotBlack PearlRuby RingTide EggOnce this quality is rolled, each one is equally likely (1/7 each)Sapphire TridentDeep Blue DiamondTide CrownRoyal DecreeMoonlight PearlOnce this quality is rolled, each one is equally likely (1/5 each)Scepter of the First Tide KingLeviathan ScaleEternal HourglassSunken StarOnce this quality is rolled, each one is equally likely (1/4 each)
 Frozen Shipyard Loot luck ×1.5
Containers: how many per floor, items each, quality odds
| Floor | Container | How many | Items | Common | Uncommon | Rare | Epic | Legendary | Mythic |
|---|---|---|---|---|---|---|---|---|---|
| Snowy DocksRim (by the docks) | Sand Pile | 8 | 1~2 | 85% | 15% | – | – | – | – |
| Frozen SlipwaysFloor 1 | Sand Pile | 10 | 1~2 | 68.3% | 24.4% | 7.3% | – | – | – |
| Frozen SlipwaysFloor 1 | Urn | 6 | 1~2 | 52.1% | 33.1% | 12.8% | 2% | – | – |
| Frozen SlipwaysFloor 1 | Crate | 6 | 2~3 | 57.5% | 30.7% | 10.8% | 1% | – | – |
| Frozen SlipwaysFloor 1 | Treasure Chest | 3 | 2~3 | 26.1% | 39.1% | 27.4% | 7% | 0.5% | – |
| Icicle HallFloor 2 | Sand Pile | 6 | 1~2 | 41% | 34.6% | 20.5% | 3.9% | – | – |
| Icicle HallFloor 2 | Urn | 6 | 1~2 | 30.2% | 34.5% | 25.9% | 8.6% | 0.8% | – |
| Icicle HallFloor 2 | Crate | 6 | 2~3 | 30.2% | 34.5% | 25.9% | 8.2% | 1.3% | – |
| Icicle HallFloor 2 | Treasure Chest | 5 | 2~4 | 7.1% | 24.8% | 40.5% | 21% | 5.9% | 0.6% |
| Permafrost DockFloor 3 | Sand Pile | 3 | 1~2 | 19.4% | 27.1% | 32.5% | 16.4% | 4.6% | – |
| Permafrost DockFloor 3 | Urn | 4 | 1~2 | 10.7% | 25% | 34.3% | 21.2% | 7.9% | 0.9% |
| Permafrost DockFloor 3 | Crate | 4 | 2~3 | 10.6% | 23.3% | 34.9% | 22.4% | 7.6% | 1.2% |
| Permafrost DockFloor 3 | Treasure Chest | 5 | 3~4 | – | 19.3% | 43.4% | 27.2% | 8.7% | 1.4% |
| Permafrost DockFloor 3 | Ancient Vault | 1 | 4~5 | – | 5.2% | 31.3% | 38.7% | 20.3% | 4.4% |
Guardians & boss: drop chance, quality, and scrolls / eggs / crystals
| Floor | Guardian | How many | Drop chance | Common | Uncommon | Rare | Epic | Legendary | Mythic | Tide Rune Scroll | Tide Egg | Hue Crystal |
|---|---|---|---|---|---|---|---|---|---|---|---|---|
| Frozen Slipways | Frost Reef CrabHP 78 · Damage 12 · Bounty 13 | 5 | 35% | 70% | 30% | – | – | – | – | 0% | 0% | 2% |
| Frozen Slipways |  Frost Tusk ChargerHP 254 · Damage 32 · Bounty 67 | 3 | 55% | 8.3% | 41.7% | 42.5% | 7.5% | – | – | 6% | 0.8% | 8% |
| Icicle Hall | Frost Rusted SentinelHP 215 · Damage 23 · Bounty 53 | 4 | 50% | – | 50% | 47.5% | 2.5% | – | – | 6% | 0.5% | 8% |
| Icicle Hall | Frost ShellbackHP 332 · Damage 26 · Bounty 80 | 3 | 60% | – | 30.8% | 53.1% | 15% | 1.2% | – | 9% | 1% | 10% |
| Icicle Hall | Frost Tusk ChargerHP 254 · Damage 32 · Bounty 67 | 2 | 55% | 8.3% | 41.7% | 42.5% | 7.5% | – | – | 6% | 0.8% | 8% |
| Permafrost Dock | Frost Deep WardenHP 507 · Damage 41 · Bounty 168 | 5 | 70% | – | 14.3% | 58.9% | 24.6% | 2.1% | – | 14% | 2% | 16% |
| Permafrost Dock | Frost ShellbackHP 332 · Damage 26 · Bounty 80 | 2 | 60% | – | 30.8% | 53.1% | 15% | 1.2% | – | 9% | 1% | 10% |
| Permafrost Dock |  RimeclawHP 4,666 · Damage 65 · Bounty 1,848HP when fighting alone; each extra player adds +60% HP (up to ×2.8). | 1 | Always 3 items | – | – | 30% | 50% | 18% | 2% | 100% | 25% | 100% |
Items you can find here ( = exclusive to this map)
Old RopeDriftwoodCork FloatPottery ShardShell ShardFish BoneRusty BoltOnce this quality is rolled, each one is equally likely (1/7 each) Frost SaltGlow JellyfishShip LanternFishing RodBrass CompassDeep Sea PotionString of Copper CoinsSea GlassOnce this quality is rolled, each one is equally likely (1/8 each)
 Glacier ShardSilver IngotTide PendantNavigator's ChartCaptain's SpectaclesPearlJade Fish CharmSilver GobletTide Rune ScrollHue CrystalOnce this quality is rolled, each one is equally likely (1/10 each)
 Frozen Ship BellGilded AnchorAncient HelmAncient GearsGold IngotBlack PearlRuby RingTide EggOnce this quality is rolled, each one is equally likely (1/8 each)Sapphire TridentDeep Blue DiamondTide CrownRoyal DecreeMoonlight PearlOnce this quality is rolled, each one is equally likely (1/5 each)Scepter of the First Tide KingLeviathan ScaleEternal HourglassSunken StarOnce this quality is rolled, each one is equally likely (1/4 each)
 Wreck Graveyard Loot luck ×1.7
Containers: how many per floor, items each, quality odds
| Floor | Container | How many | Items | Common | Uncommon | Rare | Epic | Legendary | Mythic |
|---|---|---|---|---|---|---|---|---|---|
| Graveyard RimRim (by the docks) | Sand Pile | 8 | 1~2 | 85% | 15% | – | – | – | – |
| Broken Mast ShoalFloor 1 | Sand Pile | 10 | 1~2 | 67.6% | 24.2% | 8.2% | – | – | – |
| Broken Mast ShoalFloor 1 | Urn | 6 | 1~2 | 50.9% | 32.4% | 14.2% | 2.5% | – | – |
| Broken Mast ShoalFloor 1 | Crate | 6 | 2~3 | 56.6% | 30.2% | 12% | 1.3% | – | – |
| Broken Mast ShoalFloor 1 | Treasure Chest | 3 | 2~3 | 24.7% | 37% | 29.3% | 8.3% | 0.7% | – |
| Ghost ShipyardFloor 2 | Sand Pile | 6 | 1~2 | 39.5% | 33.4% | 22.4% | 4.7% | – | – |
| Ghost ShipyardFloor 2 | Urn | 6 | 1~2 | 28.5% | 32.6% | 27.7% | 10.2% | 1% | – |
| Ghost ShipyardFloor 2 | Crate | 6 | 2~3 | 28.4% | 32.5% | 27.6% | 9.8% | 1.7% | – |
| Ghost ShipyardFloor 2 | Treasure Chest | 5 | 2~4 | 6.2% | 21.9% | 40.4% | 23.4% | 7.3% | 0.8% |
| Captain's CryptFloor 3 | Sand Pile | 3 | 1~2 | 17.5% | 24.5% | 33.4% | 18.7% | 5.9% | – |
| Captain's CryptFloor 3 | Urn | 4 | 1~2 | 9.4% | 22% | 34.2% | 23.5% | 9.7% | 1.2% |
| Captain's CryptFloor 3 | Crate | 4 | 2~3 | 9.3% | 20.4% | 34.7% | 24.7% | 9.3% | 1.6% |
| Captain's CryptFloor 3 | Treasure Chest | 5 | 3~4 | – | 16.5% | 42% | 29.3% | 10.4% | 1.8% |
| Captain's CryptFloor 3 | Ancient Vault | 1 | 4~5 | – | 4.2% | 28.4% | 39.1% | 22.8% | 5.5% |
Guardians & boss: drop chance, quality, and scrolls / eggs / crystals
| Floor | Guardian | How many | Drop chance | Common | Uncommon | Rare | Epic | Legendary | Mythic | Tide Rune Scroll | Tide Egg | Hue Crystal |
|---|---|---|---|---|---|---|---|---|---|---|---|---|
| Broken Mast Shoal | Ghost Reef CrabHP 88 · Damage 13 · Bounty 15 | 9 | 35% | 70% | 30% | – | – | – | – | 0% | 0% | 2% |
| Ghost Shipyard | Ghost Rusted SentinelHP 242 · Damage 26 · Bounty 63 | 8 | 50% | – | 46.9% | 50.5% | 2.7% | – | – | 6% | 0.5% | 8% |
| Ghost Shipyard | Ghost Reef CrabHP 88 · Damage 13 · Bounty 15 | 3 | 35% | 70% | 30% | – | – | – | – | 0% | 0% | 2% |
| Captain's Crypt | Ghost Deep WardenHP 572 · Damage 45 · Bounty 200 | 7 | 70% | – | 12.8% | 59.9% | 25.1% | 2.2% | – | 14% | 2% | 16% |
| Captain's Crypt | Tide ColossusHP 4,620 · Damage 72 · Bounty 2,000HP when fighting alone; each extra player adds +60% HP (up to ×2.8). | 1 | Always 3 items | – | – | 30% | 50% | 18% | 2% | 100% | 25% | 100% |
Items you can find here ( = exclusive to this map)
Old RopeDriftwoodCork FloatPottery ShardShell ShardFish BoneRusty BoltOnce this quality is rolled, each one is equally likely (1/7 each) Ghost CandleGlow JellyfishShip LanternFishing RodBrass CompassDeep Sea PotionString of Copper CoinsSea GlassOnce this quality is rolled, each one is equally likely (1/8 each)
 Ghost DoubloonSilver IngotTide PendantNavigator's ChartCaptain's SpectaclesPearlJade Fish CharmSilver GobletTide Rune ScrollHue CrystalOnce this quality is rolled, each one is equally likely (1/10 each)
 Sunken FigureheadGilded AnchorAncient HelmAncient GearsGold IngotBlack PearlRuby RingTide EggOnce this quality is rolled, each one is equally likely (1/8 each)Sapphire TridentDeep Blue DiamondTide CrownRoyal DecreeMoonlight PearlOnce this quality is rolled, each one is equally likely (1/5 each)Scepter of the First Tide KingLeviathan ScaleEternal HourglassSunken StarOnce this quality is rolled, each one is equally likely (1/4 each)
 Sunken Sand City Loot luck ×1.9
Containers: how many per floor, items each, quality odds
| Floor | Container | How many | Items | Common | Uncommon | Rare | Epic | Legendary | Mythic |
|---|---|---|---|---|---|---|---|---|---|
| Sandy WallsRim (by the docks) | Sand Pile | 8 | 1~2 | 85% | 15% | – | – | – | – |
| Bazaar RuinsFloor 1 | Sand Pile | 10 | 1~2 | 67% | 23.9% | 9.1% | – | – | – |
| Bazaar RuinsFloor 1 | Urn | 6 | 1~2 | 49.8% | 31.7% | 15.5% | 3% | – | – |
| Bazaar RuinsFloor 1 | Crate | 6 | 2~3 | 55.6% | 29.7% | 13.2% | 1.5% | – | – |
| Bazaar RuinsFloor 1 | Treasure Chest | 3 | 2~3 | 23.3% | 35% | 31.1% | 9.7% | 0.9% | – |
| Quicksand TempleFloor 2 | Sand Pile | 6 | 1~2 | 38.1% | 32.2% | 24.1% | 5.6% | – | – |
| Quicksand TempleFloor 2 | Urn | 6 | 1~2 | 26.9% | 30.7% | 29.2% | 11.8% | 1.3% | – |
| Quicksand TempleFloor 2 | Crate | 6 | 2~3 | 26.8% | 30.6% | 29.1% | 11.3% | 2.2% | – |
| Quicksand TempleFloor 2 | Treasure Chest | 5 | 2~4 | 5.5% | 19.3% | 39.9% | 25.4% | 8.8% | 1.1% |
| Golden TombFloor 3 | Sand Pile | 3 | 1~2 | 15.9% | 22.3% | 33.8% | 20.8% | 7.2% | – |
| Golden TombFloor 3 | Urn | 4 | 1~2 | 8.3% | 19.4% | 33.7% | 25.4% | 11.6% | 1.6% |
| Golden TombFloor 3 | Crate | 4 | 2~3 | 8.1% | 17.9% | 34% | 26.7% | 11.1% | 2.1% |
| Golden TombFloor 3 | Treasure Chest | 5 | 3~4 | – | 14.2% | 40.4% | 31% | 12% | 2.3% |
| Golden TombFloor 3 | Ancient Vault | 1 | 4~5 | – | 3.4% | 25.9% | 39.1% | 25% | 6.6% |
Guardians & boss: drop chance, quality, and scrolls / eggs / crystals
| Floor | Guardian | How many | Drop chance | Common | Uncommon | Rare | Epic | Legendary | Mythic | Tide Rune Scroll | Tide Egg | Hue Crystal |
|---|---|---|---|---|---|---|---|---|---|---|---|---|
| Bazaar Ruins |  Desert Sand LurkerHP 230 · Damage 36 · Bounty 90 | 4 | 50% | 7.4% | 36.8% | 47.5% | 8.4% | – | – | 6% | 0.8% | 8% |
| Bazaar Ruins | Desert Reef CrabHP 108 · Damage 14 · Bounty 19 | 4 | 35% | 70% | 30% | – | – | – | – | 0% | 0% | 2% |
| Quicksand Temple | Desert Sand LurkerHP 230 · Damage 36 · Bounty 90 | 3 | 50% | 7.4% | 36.8% | 47.5% | 8.4% | – | – | 6% | 0.8% | 8% |
| Quicksand Temple | Desert Rusted SentinelHP 297 · Damage 29 · Bounty 80 | 3 | 50% | – | 44.1% | 53.1% | 2.8% | – | – | 6% | 0.5% | 8% |
| Quicksand Temple | Desert Bog SpitterHP 149 · Damage 22 · Bounty 51 | 3 | 45% | 25.4% | 42.4% | 29% | 3.2% | – | – | 4% | 0.4% | 6% |
| Golden Tomb | Desert Deep WardenHP 702 · Damage 50 · Bounty 256 | 4 | 70% | – | 11.6% | 60.8% | 25.4% | 2.2% | – | 14% | 2% | 16% |
| Golden Tomb | Desert Sand LurkerHP 230 · Damage 36 · Bounty 90 | 2 | 50% | 7.4% | 36.8% | 47.5% | 8.4% | – | – | 6% | 0.8% | 8% |
| Golden Tomb | Desert Tusk ChargerHP 351 · Damage 40 · Bounty 102 | 1 | 55% | 7.4% | 36.8% | 47.5% | 8.4% | – | – | 6% | 0.8% | 8% |
| Golden Tomb |  Scarab KingHP 4,455 · Damage 85 · Bounty 2,816HP when fighting alone; each extra player adds +60% HP (up to ×2.8). | 1 | Always 3 items | – | – | 30% | 50% | 18% | 2% | 100% | 25% | 100% |
Items you can find here ( = exclusive to this map)
Old RopeDriftwoodCork FloatPottery ShardShell ShardFish BoneRusty BoltOnce this quality is rolled, each one is equally likely (1/7 each) Scarab CharmGlow JellyfishShip LanternFishing RodBrass CompassDeep Sea PotionString of Copper CoinsSea GlassOnce this quality is rolled, each one is equally likely (1/8 each)
 Desert Rose StoneSilver IngotTide PendantNavigator's ChartCaptain's SpectaclesPearlJade Fish CharmSilver GobletTide Rune ScrollHue CrystalOnce this quality is rolled, each one is equally likely (1/10 each)
 Sun DiskGilded AnchorAncient HelmAncient GearsGold IngotBlack PearlRuby RingTide EggOnce this quality is rolled, each one is equally likely (1/8 each)Sapphire TridentDeep Blue DiamondTide CrownRoyal DecreeMoonlight PearlOnce this quality is rolled, each one is equally likely (1/5 each)Scepter of the First Tide KingLeviathan ScaleEternal HourglassSunken StarOnce this quality is rolled, each one is equally likely (1/4 each)
 Clockwork Harbor Loot luck ×2.25
Containers: how many per floor, items each, quality odds
| Floor | Container | How many | Items | Common | Uncommon | Rare | Epic | Legendary | Mythic |
|---|---|---|---|---|---|---|---|---|---|
| Brass WharfRim (by the docks) | Sand Pile | 8 | 1~2 | 85% | 15% | – | – | – | – |
| Gear BridgesFloor 1 | Sand Pile | 10 | 1~2 | 65.9% | 23.5% | 10.6% | – | – | – |
| Gear BridgesFloor 1 | Urn | 6 | 1~2 | 47.9% | 30.5% | 17.6% | 3.9% | – | – |
| Gear BridgesFloor 1 | Crate | 6 | 2~3 | 54% | 28.8% | 15.2% | 2% | – | – |
| Gear BridgesFloor 1 | Treasure Chest | 3 | 2~3 | 21.3% | 31.9% | 33.5% | 12.1% | 1.3% | – |
| Steam WorksFloor 2 | Sand Pile | 6 | 1~2 | 35.8% | 30.2% | 26.8% | 7.1% | – | – |
| Steam WorksFloor 2 | Urn | 6 | 1~2 | 24.3% | 27.8% | 31.3% | 14.7% | 1.9% | – |
| Steam WorksFloor 2 | Crate | 6 | 2~3 | 24.2% | 27.7% | 31.1% | 13.9% | 3.1% | – |
| Steam WorksFloor 2 | Treasure Chest | 5 | 2~4 | 4.5% | 15.8% | 38.5% | 28.3% | 11.3% | 1.6% |
| ClockheartFloor 3 | Sand Pile | 3 | 1~2 | 13.5% | 18.8% | 33.9% | 24.1% | 9.6% | – |
| ClockheartFloor 3 | Urn | 4 | 1~2 | 6.7% | 15.7% | 32.3% | 28.1% | 14.8% | 2.4% |
| ClockheartFloor 3 | Crate | 4 | 2~3 | 6.6% | 14.4% | 32.5% | 29.4% | 14.1% | 3.1% |
| ClockheartFloor 3 | Treasure Chest | 5 | 3~4 | – | 11.1% | 37.5% | 33.2% | 14.9% | 3.3% |
| ClockheartFloor 3 | Ancient Vault | 1 | 4~5 | – | 2.4% | 22% | 38.4% | 28.4% | 8.7% |
Guardians & boss: drop chance, quality, and scrolls / eggs / crystals
| Floor | Guardian | How many | Drop chance | Common | Uncommon | Rare | Epic | Legendary | Mythic | Tide Rune Scroll | Tide Egg | Hue Crystal |
|---|---|---|---|---|---|---|---|---|---|---|---|---|
| Gear Bridges | Clockwork Rusted SentinelHP 352 · Damage 33 · Bounty 100 | 4 | 50% | – | 40% | 57% | 3% | – | – | 6% | 0.5% | 8% |
| Gear Bridges | Clockwork Reef CrabHP 128 · Damage 16 · Bounty 24 | 2 | 35% | 70% | 30% | – | – | – | – | 0% | 0% | 2% |
| Gear Bridges | Clockwork SkitterHP 45 · Damage 10 · Bounty 12 | 2 packs (4 each) | 15% | 80% | 20% | – | – | – | – | 0% | 0% | 1% |
| Steam Works | Clockwork ShellbackHP 544 · Damage 37 · Bounty 152 | 4 | 60% | – | 22.9% | 59.1% | 16.7% | 1.3% | – | 9% | 1% | 10% |
| Steam Works | Clockwork Bog SpitterHP 176 · Damage 25 · Bounty 64 | 3 | 45% | 24% | 40% | 32.4% | 3.6% | – | – | 4% | 0.4% | 6% |
| Steam Works | Clockwork Rusted SentinelHP 352 · Damage 33 · Bounty 100 | 2 | 50% | – | 40% | 57% | 3% | – | – | 6% | 0.5% | 8% |
| Clockheart | Clockwork Deep WardenHP 832 · Damage 57 · Bounty 320 | 4 | 70% | – | 10% | 61.9% | 25.9% | 2.2% | – | 14% | 2% | 16% |
| Clockheart | Clockwork ShellbackHP 544 · Damage 37 · Bounty 152 | 2 | 60% | – | 22.9% | 59.1% | 16.7% | 1.3% | – | 9% | 1% | 10% |
| Clockheart | Clockwork Tide MenderHP 240 · Damage 16 · Bounty 120 | 1 | 60% | – | 26.7% | 58.7% | 13.3% | 1.3% | – | 10% | 1.2% | 12% |
| Clockheart |  Gear WardenHP 4,800 · Damage 87 · Bounty 3,840HP when fighting alone; each extra player adds +60% HP (up to ×2.8). | 1 | Always 3 items | – | – | 30% | 50% | 18% | 2% | 100% | 25% | 100% |
Items you can find here ( = exclusive to this map)
Old RopeDriftwoodCork FloatPottery ShardShell ShardFish BoneRusty BoltOnce this quality is rolled, each one is equally likely (1/7 each)Glow JellyfishShip LanternFishing RodBrass CompassDeep Sea PotionString of Copper CoinsSea GlassOnce this quality is rolled, each one is equally likely (1/7 each) Brass CogSilver IngotTide PendantNavigator's ChartCaptain's SpectaclesPearlJade Fish CharmSilver GobletTide Rune ScrollHue CrystalOnce this quality is rolled, each one is equally likely (1/10 each)
 Steam ValveGilded AnchorAncient HelmAncient GearsGold IngotBlack PearlRuby RingTide EggOnce this quality is rolled, each one is equally likely (1/8 each)
 Clockwork HeartSapphire TridentDeep Blue DiamondTide CrownRoyal DecreeMoonlight PearlOnce this quality is rolled, each one is equally likely (1/6 each)Scepter of the First Tide KingLeviathan ScaleEternal HourglassSunken StarOnce this quality is rolled, each one is equally likely (1/4 each)
 Molten Abyss Loot luck ×2.6
Containers: how many per floor, items each, quality odds
| Floor | Container | How many | Items | Common | Uncommon | Rare | Epic | Legendary | Mythic |
|---|---|---|---|---|---|---|---|---|---|
| Abyss RimRim (by the docks) | Sand Pile | 8 | 1~2 | 85% | 15% | – | – | – | – |
| Scorched SlopeFloor 1 | Sand Pile | 10 | 1~2 | 64.8% | 23.1% | 12% | – | – | – |
| Scorched SlopeFloor 1 | Urn | 6 | 1~2 | 46.1% | 29.3% | 19.6% | 4.9% | – | – |
| Scorched SlopeFloor 1 | Crate | 6 | 2~3 | 52.4% | 28% | 17% | 2.6% | – | – |
| Scorched SlopeFloor 1 | Treasure Chest | 3 | 2~3 | 19.4% | 29.1% | 35.3% | 14.4% | 1.7% | – |
| Crystal HollowFloor 2 | Sand Pile | 6 | 1~2 | 33.7% | 28.4% | 29.2% | 8.8% | – | – |
| Crystal HollowFloor 2 | Urn | 6 | 1~2 | 22.1% | 25.2% | 32.8% | 17.4% | 2.5% | – |
| Crystal HollowFloor 2 | Crate | 6 | 2~3 | 21.9% | 25% | 32.5% | 16.5% | 4.1% | – |
| Crystal HollowFloor 2 | Treasure Chest | 5 | 2~4 | 3.7% | 13% | 36.8% | 30.5% | 13.8% | 2.2% |
| Molten CoreFloor 3 | Sand Pile | 3 | 1~2 | 11.5% | 16.1% | 33.4% | 26.9% | 12.1% | – |
| Molten CoreFloor 3 | Urn | 4 | 1~2 | 5.5% | 12.8% | 30.5% | 30% | 17.9% | 3.3% |
| Molten CoreFloor 3 | Crate | 4 | 2~3 | 5.3% | 11.7% | 30.5% | 31.3% | 16.9% | 4.2% |
| Molten CoreFloor 3 | Treasure Chest | 5 | 3~4 | – | 8.9% | 34.6% | 34.6% | 17.5% | 4.4% |
| Molten CoreFloor 3 | Ancient Vault | 1 | 4~5 | – | 1.8% | 18.9% | 37.3% | 31.2% | 10.8% |
Guardians & boss: drop chance, quality, and scrolls / eggs / crystals
| Floor | Guardian | How many | Drop chance | Common | Uncommon | Rare | Epic | Legendary | Mythic | Tide Rune Scroll | Tide Egg | Hue Crystal |
|---|---|---|---|---|---|---|---|---|---|---|---|---|
| Scorched Slope | Molten Reef CrabHP 160 · Damage 19 · Bounty 36 | 9 | 35% | 70% | 30% | – | – | – | – | 0% | 0% | 2% |
| Crystal Hollow | Molten Rusted SentinelHP 440 · Damage 38 · Bounty 150 | 8 | 50% | – | 36.6% | 60.2% | 3.2% | – | – | 6% | 0.5% | 8% |
| Crystal Hollow | Molten Reef CrabHP 160 · Damage 19 · Bounty 36 | 3 | 35% | 70% | 30% | – | – | – | – | 0% | 0% | 2% |
| Molten Core | Molten Deep WardenHP 1,040 · Damage 67 · Bounty 480 | 7 | 70% | – | 8.8% | 62.7% | 26.2% | 2.3% | – | 14% | 2% | 16% |
| Molten Core | Tide ColossusHP 7,200 · Damage 108 · Bounty 4,800HP when fighting alone; each extra player adds +60% HP (up to ×2.8). | 1 | Always 3 items | – | – | 30% | 50% | 18% | 2% | 100% | 25% | 100% |
Items you can find here ( = exclusive to this map)
Old RopeDriftwoodCork FloatPottery ShardShell ShardFish BoneRusty BoltOnce this quality is rolled, each one is equally likely (1/7 each)Glow JellyfishShip LanternFishing RodBrass CompassDeep Sea PotionString of Copper CoinsSea GlassOnce this quality is rolled, each one is equally likely (1/7 each) Magma GlassSilver IngotTide PendantNavigator's ChartCaptain's SpectaclesPearlJade Fish CharmSilver GobletTide Rune ScrollHue CrystalOnce this quality is rolled, each one is equally likely (1/10 each)
 Ember CoreGilded AnchorAncient HelmAncient GearsGold IngotBlack PearlRuby RingTide EggOnce this quality is rolled, each one is equally likely (1/8 each)
 Lava PearlSapphire TridentDeep Blue DiamondTide CrownRoyal DecreeMoonlight PearlOnce this quality is rolled, each one is equally likely (1/6 each)Scepter of the First Tide KingLeviathan ScaleEternal HourglassSunken StarOnce this quality is rolled, each one is equally likely (1/4 each)
 Stormlight Reef Loot luck ×3.15
Containers: how many per floor, items each, quality odds
| Floor | Container | How many | Items | Common | Uncommon | Rare | Epic | Legendary | Mythic |
|---|---|---|---|---|---|---|---|---|---|
| Lighthouse CapeRim (by the docks) | Sand Pile | 8 | 1~2 | 85% | 15% | – | – | – | – |
| Rod ReefFloor 1 | Sand Pile | 10 | 1~2 | 63.2% | 22.6% | 14.2% | – | – | – |
| Rod ReefFloor 1 | Urn | 6 | 1~2 | 43.4% | 27.6% | 22.4% | 6.6% | – | – |
| Rod ReefFloor 1 | Crate | 6 | 2~3 | 50.1% | 26.7% | 19.7% | 3.5% | – | – |
| Rod ReefFloor 1 | Treasure Chest | 3 | 2~3 | 16.9% | 25.4% | 37.3% | 17.9% | 2.5% | – |
| Storm GullyFloor 2 | Sand Pile | 6 | 1~2 | 30.6% | 25.9% | 32.2% | 11.4% | – | – |
| Storm GullyFloor 2 | Urn | 6 | 1~2 | 19% | 21.8% | 34.3% | 21.3% | 3.6% | – |
| Storm GullyFloor 2 | Crate | 6 | 2~3 | 18.7% | 21.4% | 33.7% | 20.1% | 5.9% | – |
| Storm GullyFloor 2 | Treasure Chest | 5 | 2~4 | 2.8% | 9.8% | 33.7% | 32.9% | 17.5% | 3.3% |
| Thunder CoreFloor 3 | Sand Pile | 3 | 1~2 | 9.1% | 12.7% | 32% | 30.3% | 16.1% | – |
| Thunder CoreFloor 3 | Urn | 4 | 1~2 | 4.1% | 9.5% | 27.4% | 31.8% | 22.3% | 4.8% |
| Thunder CoreFloor 3 | Crate | 4 | 2~3 | 3.9% | 8.7% | 27.3% | 32.9% | 21% | 6.2% |
| Thunder CoreFloor 3 | Treasure Chest | 5 | 3~4 | – | 6.4% | 30.3% | 35.7% | 21.3% | 6.3% |
| Thunder CoreFloor 3 | Ancient Vault | 1 | 4~5 | – | 1.2% | 15.1% | 35.1% | 34.5% | 14.1% |
Guardians & boss: drop chance, quality, and scrolls / eggs / crystals
| Floor | Guardian | How many | Drop chance | Common | Uncommon | Rare | Epic | Legendary | Mythic | Tide Rune Scroll | Tide Egg | Hue Crystal |
|---|---|---|---|---|---|---|---|---|---|---|---|---|
| Rod Reef | Storm Reef CrabHP 192 · Damage 21 · Bounty 45 | 4 | 35% | 70% | 30% | – | – | – | – | 0% | 0% | 2% |
| Rod Reef | Storm Tusk ChargerHP 624 · Damage 58 · Bounty 240 | 3 | 55% | 5.4% | 26.9% | 57.6% | 10.2% | – | – | 6% | 0.8% | 8% |
| Rod Reef | Storm SkitterHP 67 · Damage 13 · Bounty 23 | 1 packs (4 each) | 15% | 80% | 20% | – | – | – | – | 0% | 0% | 1% |
| Storm Gully | Storm Rusted SentinelHP 528 · Damage 42 · Bounty 188 | 4 | 50% | – | 32.3% | 64.4% | 3.4% | – | – | 6% | 0.5% | 8% |
| Storm Gully | Storm Bog SpitterHP 264 · Damage 32 · Bounty 120 | 4 | 45% | 21% | 35% | 39.7% | 4.4% | – | – | 4% | 0.4% | 6% |
| Thunder Core | Storm Deep WardenHP 1,248 · Damage 74 · Bounty 600 | 4 | 70% | – | 7.4% | 63.7% | 26.6% | 2.3% | – | 14% | 2% | 16% |
| Thunder Core | Storm Tusk ChargerHP 624 · Damage 58 · Bounty 240 | 2 | 55% | 5.4% | 26.9% | 57.6% | 10.2% | – | – | 6% | 0.8% | 8% |
| Thunder Core | Storm Tide MenderHP 360 · Damage 21 · Bounty 225 | 1 | 60% | – | 20.6% | 63.5% | 14.4% | 1.4% | – | 10% | 1.2% | 12% |
| Thunder Core |  Thunderhead EelHP 8,640 · Damage 125 · Bounty 7,200HP when fighting alone; each extra player adds +60% HP (up to ×2.8). | 1 | Always 3 items | – | – | 30% | 50% | 18% | 2% | 100% | 25% | 100% |
Items you can find here ( = exclusive to this map)
Old RopeDriftwoodCork FloatPottery ShardShell ShardFish BoneRusty BoltOnce this quality is rolled, each one is equally likely (1/7 each)Glow JellyfishShip LanternFishing RodBrass CompassDeep Sea PotionString of Copper CoinsSea GlassOnce this quality is rolled, each one is equally likely (1/7 each) Storm GlassSilver IngotTide PendantNavigator's ChartCaptain's SpectaclesPearlJade Fish CharmSilver GobletTide Rune ScrollHue CrystalOnce this quality is rolled, each one is equally likely (1/10 each)
 Thunder ConchGilded AnchorAncient HelmAncient GearsGold IngotBlack PearlRuby RingTide EggOnce this quality is rolled, each one is equally likely (1/8 each)
 Lighthouse LensSapphire TridentDeep Blue DiamondTide CrownRoyal DecreeMoonlight PearlOnce this quality is rolled, each one is equally likely (1/6 each)Scepter of the First Tide KingLeviathan ScaleEternal HourglassSunken StarOnce this quality is rolled, each one is equally likely (1/4 each)
 Moonglow Grotto Loot luck ×3.6
Containers: how many per floor, items each, quality odds
| Floor | Container | How many | Items | Common | Uncommon | Rare | Epic | Legendary | Mythic |
|---|---|---|---|---|---|---|---|---|---|
| Moonshadow ShoreRim (by the docks) | Sand Pile | 8 | 1~2 | 85% | 15% | – | – | – | – |
| Mushroom WoodsFloor 1 | Sand Pile | 10 | 1~2 | 61.9% | 22.1% | 15.9% | – | – | – |
| Mushroom WoodsFloor 1 | Urn | 6 | 1~2 | 41.3% | 26.3% | 24.3% | 8% | – | – |
| Mushroom WoodsFloor 1 | Crate | 6 | 2~3 | 48.3% | 25.7% | 21.7% | 4.3% | – | – |
| Mushroom WoodsFloor 1 | Treasure Chest | 3 | 2~3 | 15.2% | 22.8% | 38.3% | 20.6% | 3.2% | – |
| GlowpoolsFloor 2 | Sand Pile | 6 | 1~2 | 28.4% | 24% | 34.1% | 13.5% | – | – |
| GlowpoolsFloor 2 | Urn | 6 | 1~2 | 16.9% | 19.3% | 34.8% | 24.3% | 4.6% | – |
| GlowpoolsFloor 2 | Crate | 6 | 2~3 | 16.6% | 19% | 34.1% | 22.8% | 7.5% | – |
| GlowpoolsFloor 2 | Treasure Chest | 5 | 2~4 | 2.3% | 8% | 31.1% | 34.1% | 20.2% | 4.3% |
| Moon CavernFloor 3 | Sand Pile | 3 | 1~2 | 7.5% | 10.6% | 30.4% | 32.3% | 19.2% | – |
| Moon CavernFloor 3 | Urn | 4 | 1~2 | 3.3% | 7.6% | 25% | 32.5% | 25.5% | 6.1% |
| Moon CavernFloor 3 | Crate | 4 | 2~3 | 3.1% | 6.9% | 24.8% | 33.5% | 23.9% | 7.9% |
| Moon CavernFloor 3 | Treasure Chest | 5 | 3~4 | – | 5% | 27.2% | 35.9% | 24% | 7.9% |
| Moon CavernFloor 3 | Ancient Vault | 1 | 4~5 | – | 0.9% | 12.7% | 33.1% | 36.5% | 16.7% |
Guardians & boss: drop chance, quality, and scrolls / eggs / crystals
| Floor | Guardian | How many | Drop chance | Common | Uncommon | Rare | Epic | Legendary | Mythic | Tide Rune Scroll | Tide Egg | Hue Crystal |
|---|---|---|---|---|---|---|---|---|---|---|---|---|
| Mushroom Woods | Moonlit Reef CrabHP 224 · Damage 23 · Bounty 54 | 4 | 35% | 70% | 30% | – | – | – | – | 0% | 0% | 2% |
| Mushroom Woods | Moonlit SkitterHP 78 · Damage 15 · Bounty 27 | 2 packs (4 each) | 15% | 80% | 20% | – | – | – | – | 0% | 0% | 1% |
| Glowpools | Moonlit Sand LurkerHP 476 · Damage 58 · Bounty 252 | 3 | 50% | 4.9% | 24.5% | 60% | 10.6% | – | – | 6% | 0.8% | 8% |
| Glowpools | Moonlit Rusted SentinelHP 616 · Damage 46 · Bounty 225 | 3 | 50% | – | 29.4% | 67.1% | 3.5% | – | – | 6% | 0.5% | 8% |
| Glowpools | Moonlit Tide MenderHP 420 · Damage 23 · Bounty 270 | 2 | 60% | – | 18.5% | 65.2% | 14.8% | 1.5% | – | 10% | 1.2% | 12% |
| Moon Cavern | Moonlit Deep WardenHP 1,456 · Damage 81 · Bounty 720 | 4 | 70% | – | 6.5% | 64.3% | 26.9% | 2.3% | – | 14% | 2% | 16% |
| Moon Cavern | Moonlit Bog SpitterHP 308 · Damage 35 · Bounty 144 | 2 | 45% | 19.7% | 32.9% | 42.6% | 4.7% | – | – | 4% | 0.4% | 6% |
| Moon Cavern | Moonlit ShellbackHP 952 · Damage 52 · Bounty 342 | 1 | 60% | – | 15.6% | 64.7% | 18.3% | 1.4% | – | 9% | 1% | 10% |
| Moon Cavern |  Moonjelly MatriarchHP 8,820 · Damage 124 · Bounty 9,000HP when fighting alone; each extra player adds +60% HP (up to ×2.8). | 1 | Always 3 items | – | – | 30% | 50% | 18% | 2% | 100% | 25% | 100% |
Items you can find here ( = exclusive to this map)
Old RopeDriftwoodCork FloatPottery ShardShell ShardFish BoneRusty BoltOnce this quality is rolled, each one is equally likely (1/7 each)Glow JellyfishShip LanternFishing RodBrass CompassDeep Sea PotionString of Copper CoinsSea GlassOnce this quality is rolled, each one is equally likely (1/7 each) Glow MushroomSilver IngotTide PendantNavigator's ChartCaptain's SpectaclesPearlJade Fish CharmSilver GobletTide Rune ScrollHue CrystalOnce this quality is rolled, each one is equally likely (1/10 each)
 MoonstoneGilded AnchorAncient HelmAncient GearsGold IngotBlack PearlRuby RingTide EggOnce this quality is rolled, each one is equally likely (1/8 each)
 Night BloomSapphire TridentDeep Blue DiamondTide CrownRoyal DecreeMoonlight PearlOnce this quality is rolled, each one is equally likely (1/6 each)Scepter of the First Tide KingLeviathan ScaleEternal HourglassSunken StarOnce this quality is rolled, each one is equally likely (1/4 each)
 Cloudsea Ruins Loot luck ×4.5
Containers: how many per floor, items each, quality odds
| Floor | Container | How many | Items | Common | Uncommon | Rare | Epic | Legendary | Mythic |
|---|---|---|---|---|---|---|---|---|---|
| Cloud TerraceRim (by the docks) | Sand Pile | 8 | 1~2 | 85% | 15% | – | – | – | – |
| Broken BridgesFloor 1 | Sand Pile | 10 | 1~2 | 59.6% | 21.3% | 19.1% | – | – | – |
| Broken BridgesFloor 1 | Urn | 6 | 1~2 | 37.5% | 23.9% | 27.6% | 11% | – | – |
| Broken BridgesFloor 1 | Crate | 6 | 2~3 | 44.8% | 23.9% | 25.2% | 6% | – | – |
| Broken BridgesFloor 1 | Treasure Chest | 3 | 2~3 | 12.4% | 18.6% | 39% | 25.3% | 4.8% | – |
| Floating GardensFloor 2 | Sand Pile | 6 | 1~2 | 24.6% | 20.8% | 36.9% | 17.7% | – | – |
| Floating GardensFloor 2 | Urn | 6 | 1~2 | 13.5% | 15.5% | 34.8% | 29.4% | 6.7% | – |
| Floating GardensFloor 2 | Crate | 6 | 2~3 | 13.1% | 15% | 33.7% | 27.3% | 10.9% | – |
| Floating GardensFloor 2 | Treasure Chest | 5 | 2~4 | 1.5% | 5.4% | 26.5% | 35% | 25.1% | 6.4% |
| Sky SanctumFloor 3 | Sand Pile | 3 | 1~2 | 5.4% | 7.5% | 27.2% | 34.9% | 25% | – |
| Sky SanctumFloor 3 | Urn | 4 | 1~2 | 2.2% | 5% | 20.6% | 32.4% | 30.8% | 9% |
| Sky SanctumFloor 3 | Crate | 4 | 2~3 | 2.1% | 4.5% | 20.3% | 33.2% | 28.6% | 11.4% |
| Sky SanctumFloor 3 | Treasure Chest | 5 | 3~4 | – | 3.3% | 22% | 35.1% | 28.4% | 11.3% |
| Sky SanctumFloor 3 | Ancient Vault | 1 | 4~5 | – | 0.5% | 9.3% | 29.4% | 39.2% | 21.6% |
Guardians & boss: drop chance, quality, and scrolls / eggs / crystals
| Floor | Guardian | How many | Drop chance | Common | Uncommon | Rare | Epic | Legendary | Mythic | Tide Rune Scroll | Tide Egg | Hue Crystal |
|---|---|---|---|---|---|---|---|---|---|---|---|---|
| Broken Bridges | Sky Reef CrabHP 264 · Damage 25 · Bounty 69 | 3 | 35% | 70% | 30% | – | – | – | – | 0% | 0% | 2% |
| Broken Bridges | Sky Bog SpitterHP 363 · Damage 37 · Bounty 184 | 3 | 45% | 17.6% | 29.4% | 47.6% | 5.3% | – | – | 4% | 0.4% | 6% |
| Broken Bridges | Sky Tusk ChargerHP 858 · Damage 68 · Bounty 368 | 2 | 55% | 4.2% | 20.8% | 63.8% | 11.2% | – | – | 6% | 0.8% | 8% |
| Floating Gardens | Sky Rusted SentinelHP 726 · Damage 50 · Bounty 288 | 4 | 50% | – | 25% | 71.2% | 3.8% | – | – | 6% | 0.5% | 8% |
| Floating Gardens | Sky ShellbackHP 1,122 · Damage 56 · Bounty 437 | 2 | 60% | – | 12.9% | 66.8% | 18.9% | 1.5% | – | 9% | 1% | 10% |
| Floating Gardens | Sky SkitterHP 92 · Damage 16 · Bounty 35 | 1 packs (4 each) | 15% | 80% | 20% | – | – | – | – | 0% | 0% | 1% |
| Sky Sanctum | Sky Deep WardenHP 1,716 · Damage 87 · Bounty 920 | 5 | 70% | – | 5.3% | 65.1% | 27.2% | 2.4% | – | 14% | 2% | 16% |
| Sky Sanctum | Sky Tusk ChargerHP 858 · Damage 68 · Bounty 368 | 1 | 55% | 4.2% | 20.8% | 63.8% | 11.2% | – | – | 6% | 0.8% | 8% |
| Sky Sanctum | Sky Tide MenderHP 495 · Damage 25 · Bounty 345 | 1 | 60% | – | 15.4% | 67.7% | 15.4% | 1.5% | – | 10% | 1.2% | 12% |
| Sky Sanctum |  Gale RocHP 11,385 · Damage 140 · Bounty 11,960HP when fighting alone; each extra player adds +60% HP (up to ×2.8). | 1 | Always 3 items | – | – | 30% | 50% | 18% | 2% | 100% | 25% | 100% |
Items you can find here ( = exclusive to this map)
Old RopeDriftwoodCork FloatPottery ShardShell ShardFish BoneRusty BoltOnce this quality is rolled, each one is equally likely (1/7 each)Glow JellyfishShip LanternFishing RodBrass CompassDeep Sea PotionString of Copper CoinsSea GlassOnce this quality is rolled, each one is equally likely (1/7 each) Cloud CottonSilver IngotTide PendantNavigator's ChartCaptain's SpectaclesPearlJade Fish CharmSilver GobletTide Rune ScrollHue CrystalOnce this quality is rolled, each one is equally likely (1/10 each)
 Wind FeatherGilded AnchorAncient HelmAncient GearsGold IngotBlack PearlRuby RingTide EggOnce this quality is rolled, each one is equally likely (1/8 each)
 Sky CrystalSapphire TridentDeep Blue DiamondTide CrownRoyal DecreeMoonlight PearlOnce this quality is rolled, each one is equally likely (1/6 each)Scepter of the First Tide KingLeviathan ScaleEternal HourglassSunken StarOnce this quality is rolled, each one is equally likely (1/4 each)
 Tide King's Vault Loot luck ×5.3
Containers: how many per floor, items each, quality odds
| Floor | Container | How many | Items | Common | Uncommon | Rare | Epic | Legendary | Mythic |
|---|---|---|---|---|---|---|---|---|---|
| King's SeawallRim (by the docks) | Sand Pile | 8 | 1~2 | 85% | 15% | – | – | – | – |
| Golden GalleryFloor 1 | Sand Pile | 10 | 1~2 | 57.6% | 20.6% | 21.8% | – | – | – |
| Golden GalleryFloor 1 | Urn | 6 | 1~2 | 34.5% | 21.9% | 29.9% | 13.7% | – | – |
| Golden GalleryFloor 1 | Crate | 6 | 2~3 | 42.1% | 22.4% | 27.9% | 7.7% | – | – |
| Golden GalleryFloor 1 | Treasure Chest | 3 | 2~3 | 10.4% | 15.7% | 38.7% | 28.9% | 6.3% | – |
| Tide CourtFloor 2 | Sand Pile | 6 | 1~2 | 21.8% | 18.4% | 38.5% | 21.2% | – | – |
| Tide CourtFloor 2 | Urn | 6 | 1~2 | 11.3% | 12.9% | 34.1% | 33.1% | 8.7% | – |
| Tide CourtFloor 2 | Crate | 6 | 2~3 | 10.8% | 12.3% | 32.7% | 30.3% | 13.9% | – |
| Tide CourtFloor 2 | Treasure Chest | 5 | 2~4 | 1.1% | 4% | 22.9% | 34.8% | 28.7% | 8.5% |
| Throne VaultFloor 3 | Sand Pile | 3 | 1~2 | 4.1% | 5.8% | 24.4% | 36% | 29.7% | – |
| Throne VaultFloor 3 | Urn | 4 | 1~2 | 1.5% | 3.6% | 17.5% | 31.5% | 34.4% | 11.5% |
| Throne VaultFloor 3 | Crate | 4 | 2~3 | 1.5% | 3.2% | 17.1% | 32% | 31.7% | 14.5% |
| Throne VaultFloor 3 | Treasure Chest | 5 | 3~4 | – | 2.3% | 18.4% | 33.7% | 31.3% | 14.3% |
| Throne VaultFloor 3 | Ancient Vault | 2 | 4~5 | – | 0.3% | 7.3% | 26.3% | 40.4% | 25.6% |
Guardians & boss: drop chance, quality, and scrolls / eggs / crystals
| Floor | Guardian | How many | Drop chance | Common | Uncommon | Rare | Epic | Legendary | Mythic | Tide Rune Scroll | Tide Egg | Hue Crystal |
|---|---|---|---|---|---|---|---|---|---|---|---|---|
| Golden Gallery | Royal Rusted SentinelHP 880 · Damage 54 · Bounty 375 | 3 | 50% | – | 22.1% | 74% | 3.9% | – | – | 6% | 0.5% | 8% |
| Golden Gallery | Royal ShellbackHP 1,360 · Damage 61 · Bounty 570 | 3 | 60% | – | 11.2% | 68.1% | 19.2% | 1.5% | – | 9% | 1% | 10% |
| Golden Gallery | Royal Tusk ChargerHP 1,040 · Damage 75 · Bounty 480 | 2 | 55% | 3.7% | 18.4% | 66.2% | 11.7% | – | – | 6% | 0.8% | 8% |
| Tide Court | Royal Deep WardenHP 2,080 · Damage 95 · Bounty 1,200 | 3 | 70% | – | 4.5% | 65.7% | 27.5% | 2.4% | – | 14% | 2% | 16% |
| Tide Court | Royal Bog SpitterHP 440 · Damage 41 · Bounty 240 | 3 | 45% | 16.1% | 26.9% | 51.3% | 5.7% | – | – | 4% | 0.4% | 6% |
| Tide Court | Royal Tide MenderHP 600 · Damage 27 · Bounty 450 | 2 | 60% | – | 13.4% | 69.3% | 15.8% | 1.6% | – | 10% | 1.2% | 12% |
| Throne Vault | Royal Deep WardenHP 2,080 · Damage 95 · Bounty 1,200 | 5 | 70% | – | 4.5% | 65.7% | 27.5% | 2.4% | – | 14% | 2% | 16% |
| Throne Vault | Royal ShellbackHP 1,360 · Damage 61 · Bounty 570 | 2 | 60% | – | 11.2% | 68.1% | 19.2% | 1.5% | – | 9% | 1% | 10% |
| Throne Vault | Royal Tusk ChargerHP 1,040 · Damage 75 · Bounty 480 | 1 | 55% | 3.7% | 18.4% | 66.2% | 11.7% | – | – | 6% | 0.8% | 8% |
| Throne Vault |  The Tide KingHP 12,600 · Damage 145 · Bounty 18,000HP when fighting alone; each extra player adds +60% HP (up to ×2.8). | 1 | Always 3 items | – | – | 30% | 50% | 18% | 2% | 100% | 25% | 100% |
Items you can find here ( = exclusive to this map)
Old RopeDriftwoodCork FloatPottery ShardShell ShardFish BoneRusty BoltOnce this quality is rolled, each one is equally likely (1/7 each)Glow JellyfishShip LanternFishing RodBrass CompassDeep Sea PotionString of Copper CoinsSea GlassOnce this quality is rolled, each one is equally likely (1/7 each) Royal Gold ThreadSilver IngotTide PendantNavigator's ChartCaptain's SpectaclesPearlJade Fish CharmSilver GobletTide Rune ScrollHue CrystalOnce this quality is rolled, each one is equally likely (1/10 each)
 Tide King's SigilGilded AnchorAncient HelmAncient GearsGold IngotBlack PearlRuby RingTide EggOnce this quality is rolled, each one is equally likely (1/8 each)
 Crown JewelSapphire TridentDeep Blue DiamondTide CrownRoyal DecreeMoonlight PearlOnce this quality is rolled, each one is equally likely (1/6 each)Scepter of the First Tide KingLeviathan ScaleEternal HourglassSunken StarOnce this quality is rolled, each one is equally likely (1/4 each)
How drops are decided
- First, how many items: each container has a fixed range (for example 2–4 for a chest). For guardians, the drop chance is checked first.
- Each item rolls its own quality using the table: Common, Uncommon, Rare, Epic, Legendary or Mythic.
- Then one item is drawn evenly from that quality: general treasures plus this map's exclusive materials. Tide Rune Scrolls and Hue Crystals are Rare and Tide Eggs are Epic, so containers can give them too; guardians, bosses and airdrops also have extra chances for these three.
What makes better loot more common
- Map loot luck: later maps multiply the Rare+ odds; in containers Epic+ is pushed further (luck ^ (0.85 × tiers above Rare)). The per-map tables already include it.
- Treasure Tide: during a Treasure Tide, Rare+ odds from containers and airdrops are ×1.8.
- Your own luck: the Lucky Compass pass gives ×1.25, and lucky trinkets, pet perks and treasure potions add more. Containers only.
- Guardian drops only use the map's loot luck (Rare+); Treasure Tides and your own luck don't affect them.
- Elite guardians drop like normal guardians, plus one extra treasure that is always Rare or better (never a material like a scroll or crystal). A boss always drops 3 Rare+ items plus a Tide Rune Scroll and a Hue Crystal, with a 25% chance of a Tide Egg.
Base drop table for each guardian
These are base odds before the map's loot luck. On later maps guardians get a regional name (like Bog Reef Crab) but use the same table as their base type.
| Reef CrabHP 40 · Damage 8 · Bounty 6 | 35% | 1 | 70% | 30% | – | – | – | – | 0% | 0% | 2% | 35%: 4–8 rounds |
| SkitterHP 14 · Damage 5 · Bounty 3 | 15% | 1 | 80% | 20% | – | – | – | – | 0% | 0% | 1% | 20%: 2–4 rounds |
| Bog SpitterHP 55 · Damage 12 · Bounty 16 | 45% | 1 | 30% | 50% | 18% | 2% | – | – | 4% | 0.4% | 6% | 45%: 6–10 rounds |
| Rusted SentinelHP 110 · Damage 16 · Bounty 25 | 50% | 1 | – | 60% | 38% | 2% | – | – | 6% | 0.5% | 8% | 50%: 6–12 rounds |
| Tusk ChargerHP 130 · Damage 22 · Bounty 32 | 55% | 1 | 10% | 50% | 34% | 6% | – | – | 6% | 0.8% | 8% | 50%: 8–14 rounds |
| Sand LurkerHP 85 · Damage 20 · Bounty 28 | 50% | 1 | 10% | 50% | 34% | 6% | – | – | 6% | 0.8% | 8% | 50%: 6–12 rounds |
| ShellbackHP 170 · Damage 18 · Bounty 38 | 60% | 1 | – | 40% | 46% | 13% | 1% | – | 9% | 1% | 10% | 55%: 8–16 rounds |
| Tide MenderHP 75 · Damage 8 · Bounty 30 | 60% | 1 | – | 45% | 44% | 10% | 1% | – | 10% | 1.2% | 12% | 50%: 6–12 rounds |
| Deep WardenHP 260 · Damage 28 · Bounty 80 | 70% | 1 | – | 20% | 55% | 23% | 2% | – | 14% | 2% | 16% | 60%: 10–18 rounds |
| Tide ColossusHP 1,500 · Damage 45 · Bounty 800 | 100% | 3 | – | – | 30% | 50% | 18% | 2% | 100% | 25% | 100% | 100%: 40–60 rounds |
How to fight each guardian
| Guardian | Weak to | How it attacks and how to dodge |
|---|---|---|
| Reef Crab |  Incendiary Rounds | Pounces and pinches twice, the second one quickly; the red area shows 0.55 s before it lands, so step aside when you see it. |
| Skitter |  Blast Rounds | Comes in packs of 4: small, fast and fragile. The spin slash on your 3rd combo hit clears them best. |
| Bog Spitter |  Frost Rounds | Stays back and spits goo at your feet (5-stud splash); a circle marks the spot first, so just walk out of it. |
| Rusted Sentinel |  Tracer Rounds | Lunges straight ahead along a 14-stud line after a 0.7 s warning; step off the line to dodge. |
| Tusk Charger | Frost Rounds | Winds up for 0.95 s while a lane appears, then charges 30 studs along it; don't stand in the lane. |
| Sand Lurker | Tracer Rounds | Can't be hit underground; a circle appears under you when you're close and it bursts out 1 s later. Hit it while it's above ground. |
| Shellback |  Armor-Piercing Rounds | Has a big front shield: hits from the front only do 25% damage. Hit it from behind, with the 3rd combo hit, skills or throwables for full damage. |
| Tide Mender | Incendiary Rounds | Every 4.5 s it heals guardians within 24 studs by 12%; if it's in a group, take it out first. |
| Deep Warden | Armor-Piercing Rounds | Leaps and slams (a 6-stud circle) or sweeps 150° in front; hits knock you back, so keep a little distance. |
| Tide Colossus | Armor-Piercing Rounds | Stomps a huge 18-stud shockwave and swipes its arms; if you're more than 18 studs away it throws boulders. Map bosses also have a signature attack (see Bosses & vaults). |
Each map's boss and Ancient Vault
Every map has a boss on the bottom floor (the first maps use the Tide Colossus), and all of them use the Colossus drop table. The more players fighting it, the more HP it has. The Ancient Vault is on the bottom floor too and needs a key.
| Name | Boss | Signature attack | Weak to | Vaults | Boss HP bonus |
|---|---|---|---|---|---|
| Tidal Atoll | Tide Colossus | Shockwave stomp, arm swipe and boulders | Armor-Piercing Rounds | 1 | ×2.8 |
| Firefly Mangroves | Old Rootback | A circle under every player (every 9 s, 1.1 s warning) | Incendiary Rounds | 1 | ×2.3 |
| Pastel Coral Garden | Coral Queen | A row of circles toward a player (every 8 s, 1 s warning) | Blast Rounds | 1 | ×1.75 |
| Frozen Shipyard | Rimeclaw | A big ring around the boss (every 10 s, 1.3 s warning); run outside it | Incendiary Rounds | 1 | ×1.45 |
| Wreck Graveyard | Tide Colossus | Shockwave stomp, arm swipe and boulders | Armor-Piercing Rounds | 1 | ×1.4 |
| Sunken Sand City | Scarab King | Burrows under the farthest player and bursts out (every 10 s, 1.2 s warning) | Frost Rounds | 1 | ×1 |
| Clockwork Harbor | Gear Warden | A long lane toward a player (every 9 s, 1.2 s warning); step aside | Armor-Piercing Rounds | 1 | ×1 |
| Molten Abyss | Tide Colossus | Shockwave stomp, arm swipe and boulders | Armor-Piercing Rounds | 1 | ×1.2 |
| Stormlight Reef | Thunderhead Eel | A circle under every player (every 8 s, 1 s warning) | Frost Rounds | 1 | ×1 |
| Moonglow Grotto | Moonjelly Matriarch | A donut-shaped area (every 10 s, 1.4 s warning); standing close to the boss is safe | Tracer Rounds | 1 | ×1 |
| Cloudsea Ruins | Gale Roc | A long lane toward a player (every 9 s, 1.3 s warning); step aside | Blast Rounds | 1 | ×1 |
| Tide King's Vault | The Tide King | A long lane toward a player (every 8 s, 1.4 s warning); step aside A big ring around the boss (every 8 s, 1.3 s warning); run outside it | Armor-Piercing Rounds | 2 | ×1 |
 Vault key
The Ancient Vault on the bottom floor only opens with a key. Everyone who helps defeat the boss gets one, and a floor 3 chest has a 20% chance to drop one the first time it's opened. The key only lasts for that run.
Message bottle
Floors 1 and 2 each have 1 message bottle. Open it and a gold beam marks a deeper chest you haven't opened yet (or the vault if there are none) on your screen for 90 s.
Supply drops and the Salvage Crew
 Supply drop crate
During a raid a crate sometimes floats down on a parachute; anyone can open it (first come, first served). It holds one chest's worth of loot (for the floor it lands on), plus 1–2 crafting materials for ammo, throwables and potions (Rusty Bolt, String of Copper Coins, Glow Jellyfish, Sea Glass, Cork Float, Old Rope, Driftwood, Shell Shard, Pottery Shard); a 25% chance of a Tide Rune Scroll, 12% for a Hue Crystal and 3% for a Tide Egg. The first few players to open it also get a supply bundle (ammo, a throwable, a potion).
 Salvage Crew (idle)
One crate builds up every 10 minutes, even while you're offline. Each crate has coins, plus a 40% chance of one treasure (general treasures only, never map-exclusive materials). Coins and quality depend on your rank:
| Rank | Coins per crate | Common | Uncommon | Rare | Epic | Legendary | Mythic |
|---|---|---|---|---|---|---|---|
| Trainee Raider | 25~60 | 80% | 20% | – | – | – | – |
| Bronze Raider | 50~120 | 65% | 30% | 5% | – | – | – |
| Silver Raider | 100~240 | 50% | 38% | 12% | – | – | – |
| Gold Raider | 200~480 | 40% | 40% | 18% | 2% | – | – |
| Legendary Raider | 350~840 | 30% | 40% | 25% | 5% | – | – |